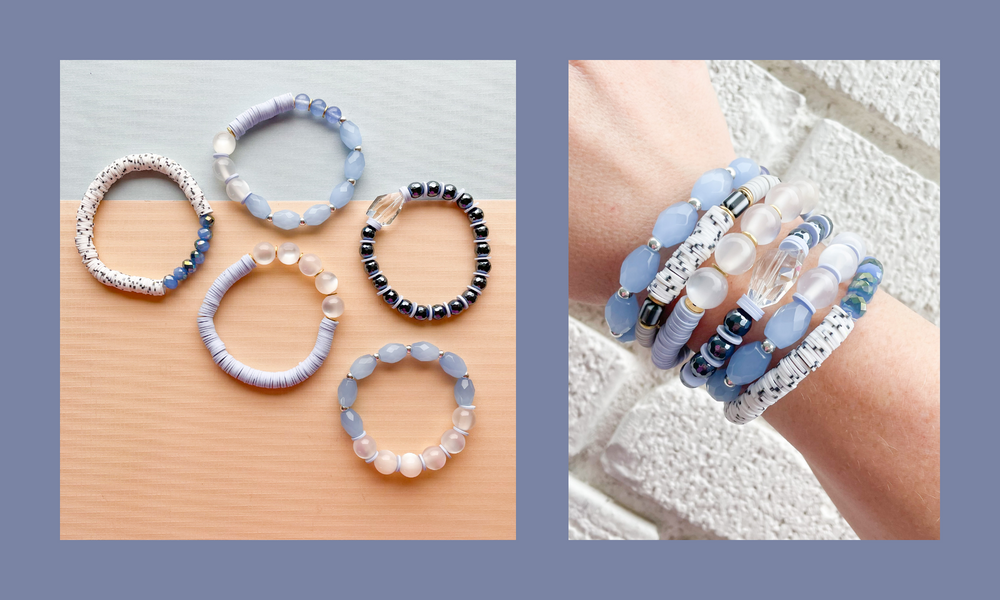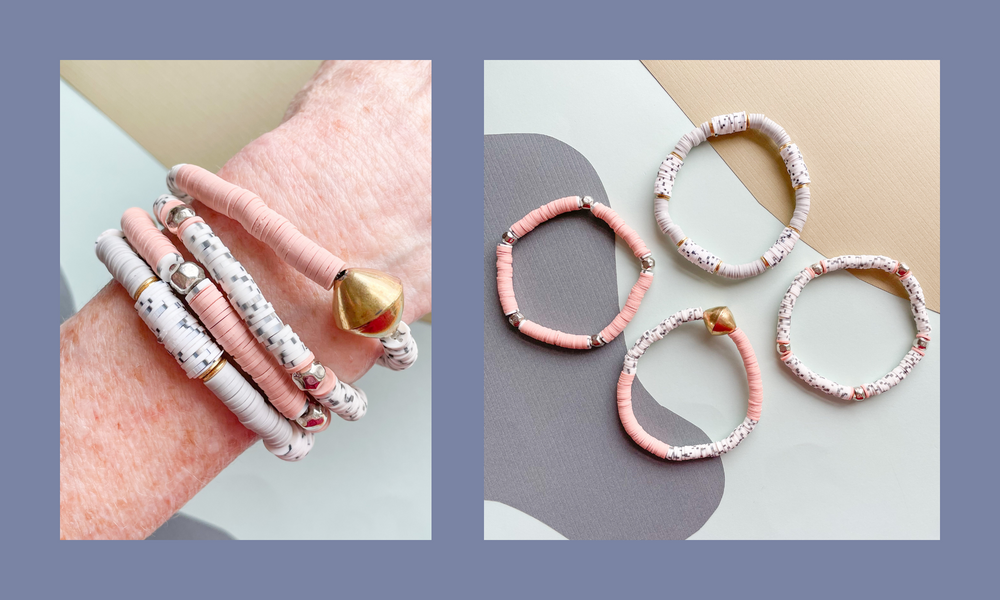

Domino and Moleskine are two of our best-selling polymer clay colors. The peachy-tan and gray dotted white strands complement so many other colors well, while still looking elegant on their own. It only seemed natural to pair them together, adding in both gold and silver accents. Follow along with the tutorial below to recreate these bracelets exactly, or put your own spin on things by switching out moleskine for another not-quite-neutral color. You could also use different gold and silver spacers/accents, whatever you have leftover from other projects is almost certain to match with these colors!
WHAT DO I NEED TO MAKE MY OWN MOLESKINE AND DOMINO STRETCHY STACK?
- one strand 8mm Domino Polymer Clay Heishi
- one strand 6mm Domino Polymer Clay Heishi
- one strand 6mm Moleskine Polymer Clay Heishi
- one strand 6mm Gray Sweatpants Polymer Clay Heishi
- one strand of 6mm Brushed Brass Heishi
- two packs of of 8mm Silver Pewter Nuggets
- one pack of 15mm Gold Brass Handmade Bicones
- one spool of 1mm Stretch Magic Stretchy Stringing Cord
- one Designer Wire Cutter
- scotch tape
STEP-BY-STEP INSTRUCTIONS FOR MAKING A STRETCH BRACELET
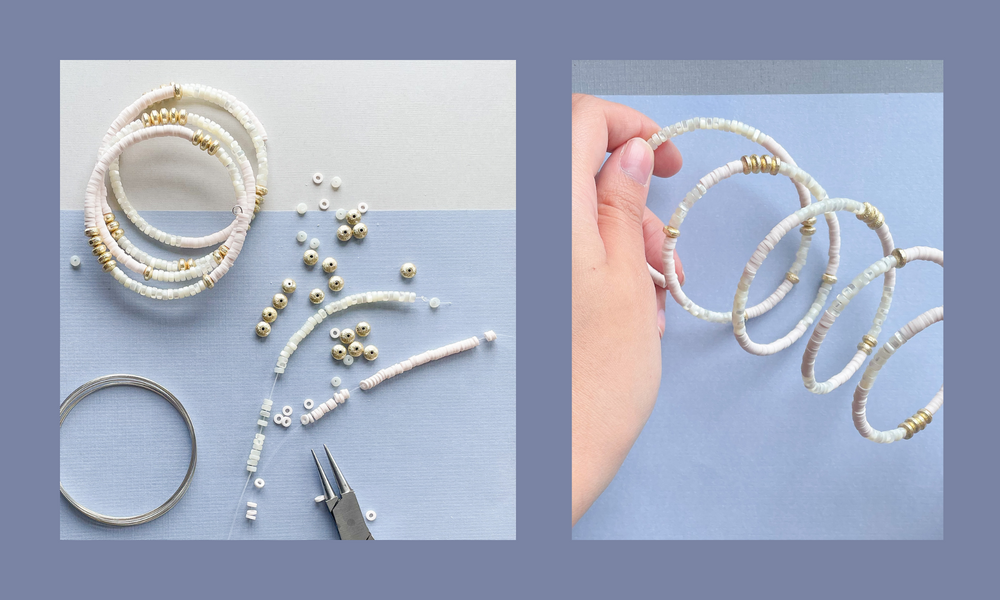
STEP 1: CUT + PREPARE THE STRETCH CORD
to start off your stretchy bracelets, gather your beads, stretch magic, super new glue, cutters or scissors, & tape if you have some on hand. cut a length of stretch magic a few inches longer than the length of your wrist. no measurements required - simply wrap the cord around your wrist & eyeball a few extra inches.
for these bracelets, we're using the 1mm size of Stretch Magic, which we sell in packs of 5m, 25m, and 100m. shop here.

tape off one end of your stretch magic with a piece of tape, as pictured. this should be approximately two inches away from the actual end of the cord.
STEP 2: STRING YOUR BEADS
You can design your bracelet and string your beads however you want, but if you're interested in re-creating this project exactly, string the four bracelets as follows (from left to right):
Bracelet 1 - String about 30 6mm Moleskine Heishi beads, followed by one 6mm Domino Heishi bead, followed by one 8mm Silver Pewter Nugget. The pattern continues with another Domino Heishi, followed by 30 more Moleskine Heishi beads. We used a total of five Silver Nugget beads, and it was the perfect length, but could be adjusted bigger or smaller by adding more Moleskine beads in between the spacers or taking some away.
Bracelet 2 - String approximately 20 8mm Domino Heishi beads, followed by two 6mm Brushed Brass Heishi beads, followed by approximately 20 6mm Gray Sweatpants Heishi beads, and two more 6mm Brushed Brass beads. We repeated the pattern a total of five times, but like the first bracelet, you can easily adjust the size by stringing less or more per each section.
Bracelet 3 - This bracelet is the inverse of Bracelet 1! Approximately 30 6mm Domino Heishi beads, one 6mm Moleskine Heishi bead, one Silver Nugget bead, one Moleskine, and then the Domino segment repeats.
Bracelet 4 - String approximately 40 6mm Domino Heishi beads, followed by approximately 40 Moleskine Heishi beads. Repeat once, and then string one 15mm Handmade Brass Bicone on for a focal bead!
Once finished stringing, it's time to tie off the bracelet.
PRO TIP: when making multiple bracelets, tape off the other end of the stretch magic & tie all of the bracelets off once you are done stringing all of your bracelet.
STEP 3: TIE THE BRACELET
Hold the un-taped side carefully with your index finger & thumb, & hold the taped side of the stretch up with your other hand, so that you are able to grasp the stretch underneath the tape.

Use both hands to hold the stretch close to the beads & stretch it out by moving your hands away from each other. Do this several times to ensure that the elastic is activated & you will able to knot the stretch as close to the beads as possible, creating a more seamless look.
Next, tie the two opposing ends of the cord together in a standard knot, & then a double knot - for a total of three knots. When you do this, put as much pressure on the stretch as you comfortably can, so that there will not be excess material showing.

STEP 4: GLUE (OUR SECRET)
Hold both sides of the stretch with your thumb pressing onto your index finger, & use super new glue to apply a small drop of glue onto the knot. Let dry for a few seconds while still pulled taught before allowing the stretch to relax.
Finally, cut the two loose ends of the stretch as close to the knot as you can with your cutters or scissors. If possible, it's great to finish your bracelet by a bead with a larger opening, so that you can easily tuck the knot into the bead. In this case, using the Silver Nugget beads and the large Brass Bicone work well for hiding the knot.
It's really that easy!
VIDEO TUTORIAL:
Can't get enough? Check out one of our video tutorials below walking through our Love Multi Stretchy Bracelet Making Kit and a step-by-step on tying off your stretchy bracelets.