Today in my free video jewelry making tutorial for beginners we are going to make chokers. I am so excited to be making chokers today. This trend has been going strong for a few years now, but really came back in 2020. And there's no reason to spend big on it, especially when it can be so easy to make your own DIY choker necklaces. This simple choker is made with beads, a charm, and a clasp.
Simple Choker Necklace Video Tutorial
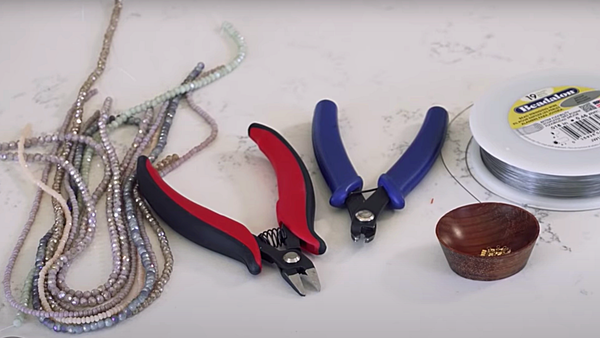
Materials and supplies
Materials that we'll need to create this technique:
- nylon coated stainless steel wire
- crimp beads
- crimping pliers
- wire cutters
- 2mm – 4mm crystal beads
- jump ring
- the charm of your choice
- Lobster clasp
Pro tip: When choosing your beads for this technique, I highly recommend choosing beads that come pre-strung on a temporary fishing line or thread. This is going to make it easier to determine your finished length. It's also going to make it easier to string the beads.
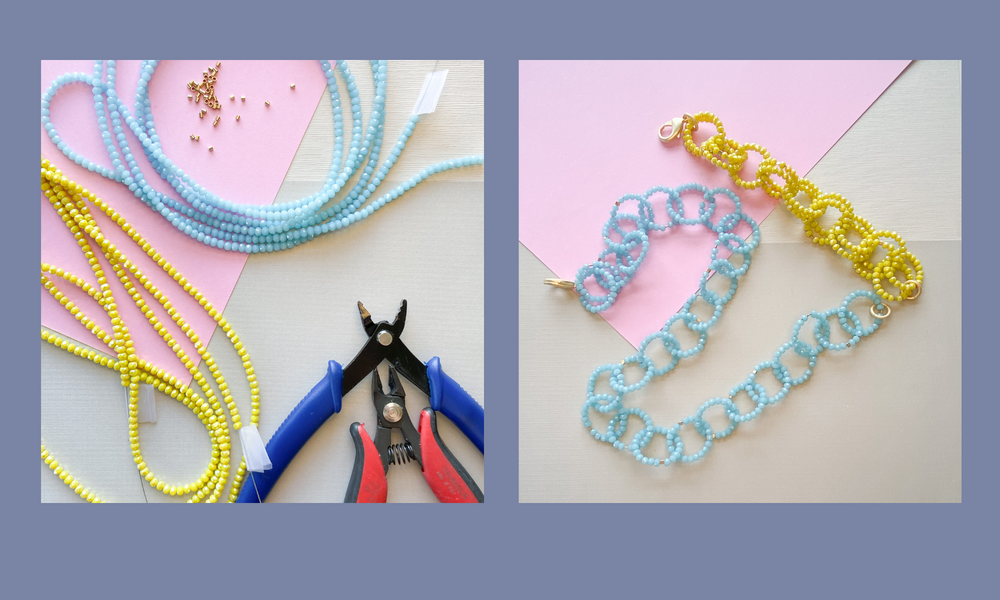
Step-by-step instructions with photos
Step 1: Prepare your materials.
I'm using these small lavender crystal beads, but you can use any small beads you'd like.
To start, we'll cut a piece of our nylon coated stainless steel wire about two feet long. This length will create a choker with a finished length of about 14 to 15 inches long, which is a general size for an adult. If you’d like a bigger size, adjust your initial wire length accordingly. Don’t forget, you’ll need a little more than you think to allow for breathing room and movement. Do not make this necklace too tight!
Whenever I make necklaces, before I start stringing, I put a little piece of tape at the end. So, that we don't have to worry about the beads coming off the other side as we string our beads.
Step 2: String your necklace.
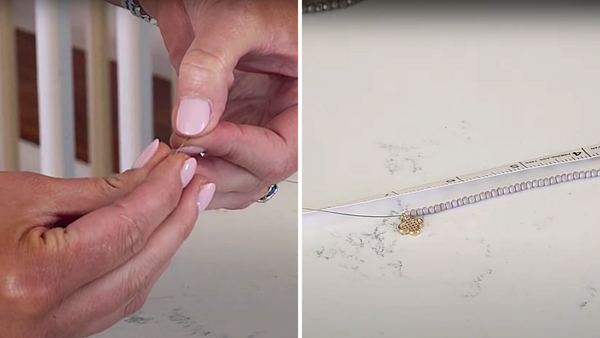
Now we are going to go ahead and open up the end of our crystal strand. We want to leave that excess string there on the end because it's going to make it easier to transfer the beads from string to wire.
As a time-saving technique, we can pull several beads off of the string at the same time, hold them in between our fingers with all of the holes lined up and then simply transfer them onto the wire. This makes it go a lot faster than doing one bead at a time, especially with tiny beads. You may also have luck with lining your wire up against the fishing line and stringing several beads along that line at once. Whatever's most comfortable for you is just fine.
Step 3: Add your charm to your necklace.
Keeping in mind that the finished length of your necklace will be about 14 inches long, you'll string about seven inches of your necklace and then you'll add your charm which we want in the middle of the necklace, and then string the rest of our beads. This is a very simple necklace to make.
Step 4: Add clasps to finish the choker necklace.
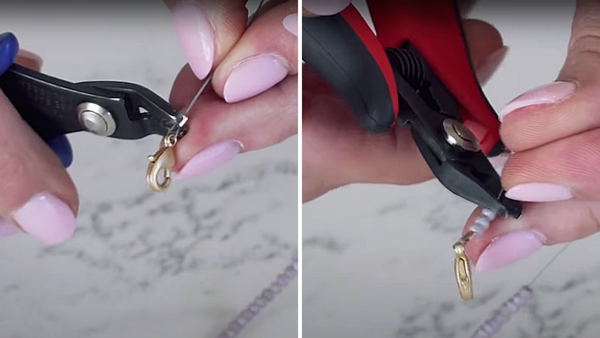
Once your total desired length is strung, we're going to one side of our clasp to each side. I am using a small brushed lobster claw clasp and a jump ring, so I'm going to use a crimping technique.
If you are new to crimpling, please check out my other videos on basic crimping, by clicking here. If you are a beginner, check out this video tutorial below on crimping. It’s very straight forward and easy. Be sure to check out our LEARN page where we have tons of easy and quick tutorials for basic techniques.
To finish the necklace, I'm going to string the end of the wire through my crimp bead and my lobster claw to attach it. And then I will string that same wire back through a couple of beads to secure it. Then snip off our extra and move these down. To finish the necklace on the other side, we will attach the crimp bead and jump ring over in the same way.
One thing to consider when you're finishing up making a choker necklace is to add a chain extender to the back of it. That way you have a little room to adjust the size and fit, which is great for styling this with different necklines. This is also a great thing to do if you plan to give this homemade necklace as a gift and aren’t sure of the measurements.
Some common questions about making DIY chokers:
What are chokers made of?
In this tutorial, we’ve used wire, beads, and clasps to make this choker. Chokers made of seed beads are also popular. Sometimes those are referred to as VSCO chokers, a recent trend. A very easy way to make a choker is to use ribbon or leather string for a simple look.
How long should you make a choker necklace?
As I mentioned above the average length of a choker necklace for an adult is 14-17 inches. Of course, you can make it longer if you’d like. To make a necklace this length, you’ll need around 24 inches or wire or string.
How can I make my choker necklace longer?
You can increase the length of your choker by including an extender in your design. I like to do this if I am making it as a gift or depending on how I plan to style the necklace.
Thank you for watching my simple choker necklace jewelry making video tutorial! What I love about chokers is that they make great layering pieces and they make awesome gifts. Hopefully, you've learned how to make a choker necklace from this jewelry making video tutorial and by following along with these step-by-step instrictions. I am always happy to teach any and all jewelry making techniques from beginner to advanced in my free videos. Let me know what you want to learn next!