Today we're going to be talking about some of the most common mistakes that people make when they are first getting into jewelry making. We speak with a lot of beginner jewelry makers in our stores and some of these solutions to these common mistakes we see people making have really helped a lot. I hope this post will help you stop making these common mistakes and enjoy your jewelry making more!
And if I don't go over your specific type of jewelry making, feel free to ask more specific questions in the comments section below. We make new video tutorials each week, so I always love to know ways that we can help you all learn more about jewelry making. It’s really not hard – this is one of the main reasons I started my blog and YouTube channel – I want people to know that jewelry making can be fun and easy. I love this craft so much and I want to teach you the techniques and tips that help make it easier and more fun.
Mistake #1: Not understanding how to use a bead board

First things first. We want to understand our bead board. There are three channels surrounding the board where you can lay out your beads and create a design. These are labeled with numbers and I think a lot of people may not know exactly what these numbers are for or what they reference.
Let's set the record straight. These numbers don't refer to how many beads you have on your board. The outside refers to inches. The inside refers to centimeters. So most folks here in the US are most familiar with inches. So, I always suggest that people go with that outside group first. This lets you know how long your bracelet or necklace will be. That helps so much with planning, so you know your design will be the right length for the project you are making. It also helps you know how much wire or cord to cut. So, it is very easy to work with. But I do recommend that jewelry makers should always keep a tape measure handy to double-check that length once your jewelry is strung.
As you get more comfortable with using the numbers along the bead board, you may start to notice yourself taking the length and positioning of the beads into account more because those numbers and that placement are at the top of your mind more. The bead board really is a handy tool for jewelry making.
Mistake #2: Stringing beads the hard way

Next, one common mistake that people make is taking their beads from the filament and just cutting them on to their board. This creates a lot more work than is necessary when you start to string your beads onto wire or cord.
Because all the beads are loose, you need to find each bead, pick it up one at a time and string it onto the wire, finding where the hole is each time. Don’t get me wrong, there are certainly situations where this is the preferred method. Sometimes you may want to break up the strand of twenty-five bead and use them in different patterns or different designs.
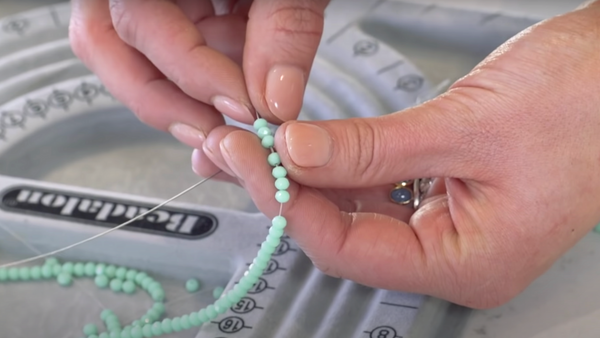
But, for the times when you are stringing a whole line of the same bead, there is a much easier way to string these, that allows you to blaze through them really quickly. There are a few different ways to accomplish this technique, but the idea is to leave the beads on the temporary filament as you string them onto your wire. So leave them on the filament, and either pull the beads off off several at a time at string them onto the wire all at once. Or you can even just take the bead stringing wire and stringing it straight along that temporary filament. Then when you remove that filament, all the beads will already be strung on your wire. So much faster than picking up each bead individually! This is one of my favorite tips for beginners. I find it makes jewelry making much more enjoyable because you’ll get to your finished design faster.
Mistake #3: Not investing in quality wire
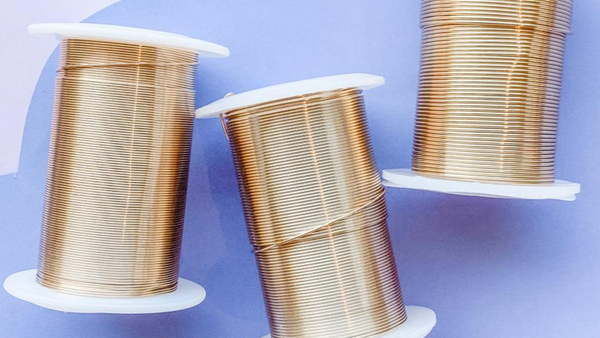
I know the idea of spending ten to twenty-five dollars on this spool of stringing wire is a little much, especially after you've already spent money on all those gorgeous beads. But I cannot emphasize how important it is to invest in quality stringing wire. Think about it: It's like building a beautiful home and paying no attention to the foundation. It can be a little bit tempting to look at some of those seven strand wires at the craft store, but your customers and you will definitely see a payoff in the end when you use a higher filament wire. You should use a 19 strand and up even a 49 strand is a really nice stringing wire.
You don’t want to run the risk of your necklace breaking if the wire breaks and losing all of your beautiful beads. You want that necklace to last! Please use high-quality stringing wire! I hate to see pieces fall apart and have some of the beads lost or ruined because of low-quality wire.
Mistake #4: Pressing too hard when crimping
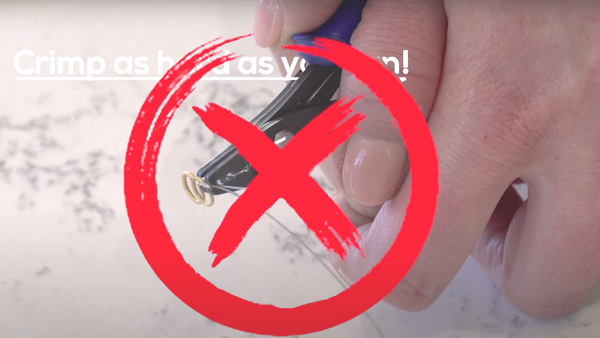
We can also take a look at crimp beads while we're on the subject of wire. This is something people ask me about a lot, but I have to admit, it still seems the most counterintuitive to me. The mistake is thinking that if you squeeze a crimp bead with both of your hands or squeeze it really, really hard, that that's going to help it hold better. I have a lot of people that will say, you know, ‘what am I doing wrong?’ when their crimping is not holding.
Realistically, crimping and using the crimp beads and crimping wire should be pretty easy. You should be able to just apply firm pressure and that should hold to the nylon on your wire. If for some reason you're having any trouble with that, you can always try a crimp tube that is twisted or fluted, like a tornado crimp and simply use your flat nose pliers or chain nose pliers to flatten that crimp.
Mistake #5: Thinking wrapping head pins is difficult

Another common mistake that people will make is shying away from trying out wrapped loops on head pins and chain linking. I know it's really easy to either shy away from that or get comfortable with like a simple open loop. But part of why I started my channel was because I saw people were thinking it was much, much more difficult to tie off a head pin than it actually was.

So many of the tutorials and guides out there have you doing this like five step process that can be incredibly daunting, but it doesn't have to be. And once you know how to do this, it really becomes such a neat skill to know how to do and really takes your jewelry making to the next level. So don't be afraid to try out things like that and know that you can do it and practice until you get it right.
Mistake #6: Letting fear get in the way
Another common thing I see, is that people are not just afraid of techniques like wrapping loops, but they are afraid in general. Sometimes negative self-talk can really get in the way of making jewelry. Saying things to yourself like “I'm not creative enough” or “I don't know how to put these beads together or” I like to buy the beads and then I never really know what to do with them once I get them home” is something that I think all jewelry makers should avoid. Everyone experiences things like that, but the thing is that jewelry making by its nature has a simple solution to this problem.
The cool thing about jewelry making (there's lots of cool things let's be honest!) is that if I make something today and I don't like it tomorrow or I don't like it a year from now, I can literally take it apart and recreate it and the only thing that I have lost is my wire.
I mean, how many crafts are there that work that way? This should stop your negative self-talk in its tracks. There is no way to fail in jewelry making because you can always easily start over. You can create a design, think it over for a day and then come back and make edits. And that is all part of the creative process. And luckily jewelry making allows us to be very creative and to enjoy that process. Other crafts like sewing or painting that require cutting or painting materials cannot be so easily changed.
So, please do not let those things stop you from creating jewelry!
I hope these tips for solving some of the most common jewelry making mistakes will work well for you and encourage your creativity.